cmpnyinfo: deploying through aws III(fin)
Subtitle: uploading image to ecr; deploying with ecs
Introduction
In this post, I am going to talk about
- uploading the docker image to ECR
- creating cluster in ECS
- writing task definition for my cmpnyinfo application
- creating service & deploying with ECS
Uploading to ECR
I am going to explain how I setup awscli in my Ubuntu WSL. This should work just fine even if you are just using Ubuntu that’s not WSL.
First, you have to create an user in the IAM console. Create an access key and set the policies for Public&Private registry.
Secondly, type the command sudo apt install awscli to install awscli
- If this give you an error, try typing:
pip install 'urllib3<2'
Thirdly, type the command aws configure; and configure your settings accordingly.
- You can type
aws configure listto see all the configurations of the profiles you created
Lastly, copy the commands in provided by ECR when you push the View push commands button. It should look something like this
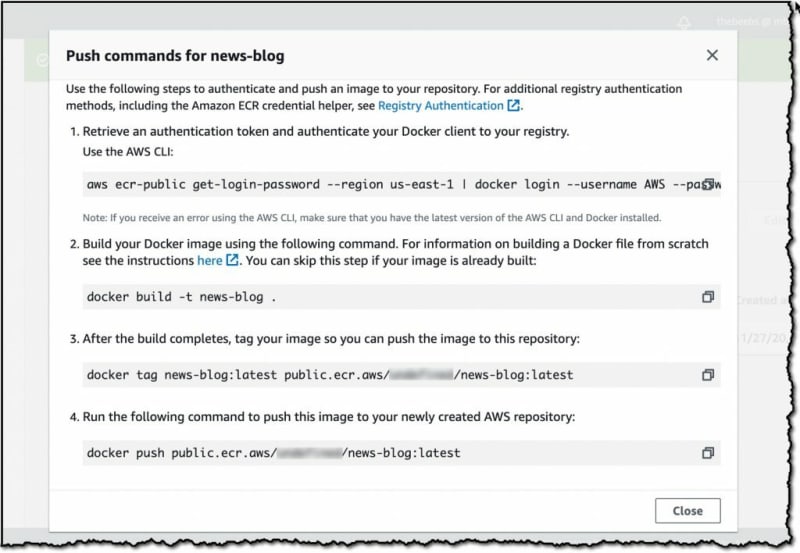
- If you facen and error, configure the ~/docker/config.json file and delete this line
"credStore": "desktop" - The full code would look sth like this
{
"auths": {
  "https://index.docker.io/v1/": {},
  "public.ecr.aws": {
    "auth": "some-stuff
  }
}
}
Mind the comma! Make the code compiable!
Creating cluster
Now you have to create the cluster; which, as I explained, is the cluster of underlying infrastructures, such as EC2 instances, required to run your application.
There are two options for your infrastructure for your cluster
- Fargate
- EC2
For my application, I am going to use EC2. However, I believe most people prefer fargate, due to its simplicity and extra features. So if you want to launch your application with fargate, you can go ahead and watch this tutorial.
https://www.youtube.com/watch?v=esISkPlnxL0&list=WL&index=13&t=916s
It is so far the best tutorial I have found, so I strongly recommend you watching it!
Now you can just go to the ecs page.
https://us-east-1.console.aws.amazon.com/ecs
Infrastructure
And click the “Create cluster” button, and choose the infrastructure type as EC2. Like this:
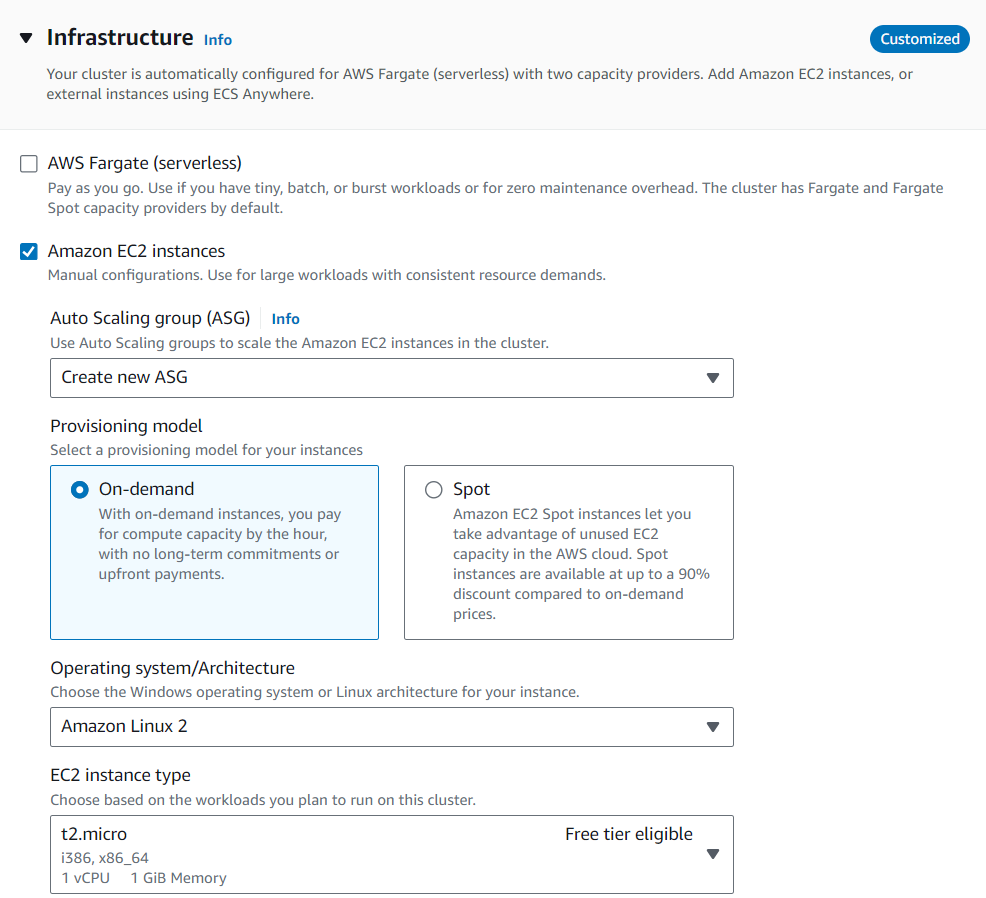
Configure you OS and instance type accordingly. I used Amazon Linux 2 and t2.micro(free tier) for my application
Then, modify the rest of the setting in the “infrastructure tab”
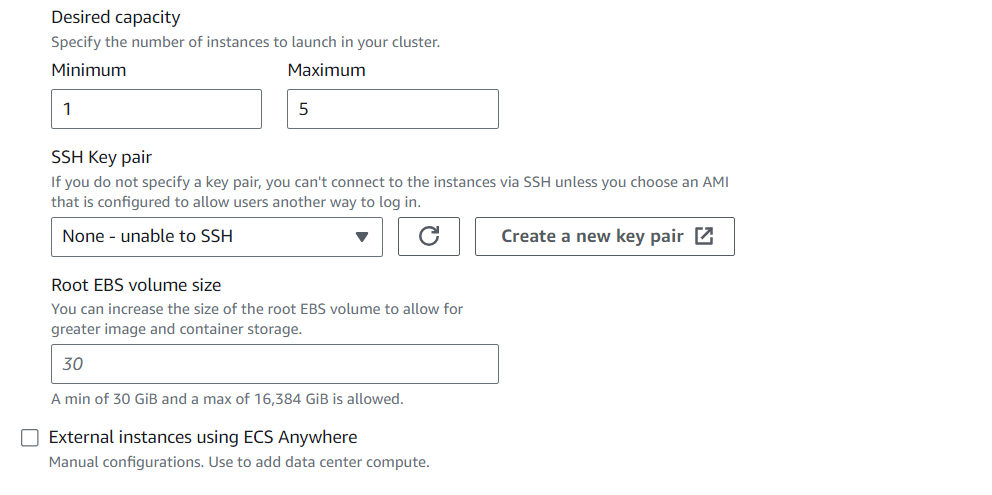
set the minimum capacity as 1, or else no EC2 instance will be created and your tasks will be stuck in provisioning state.
create a new key pair if you don’t have one! choose .pem type unless you are going to use PuTTY for SSH.
Network settings
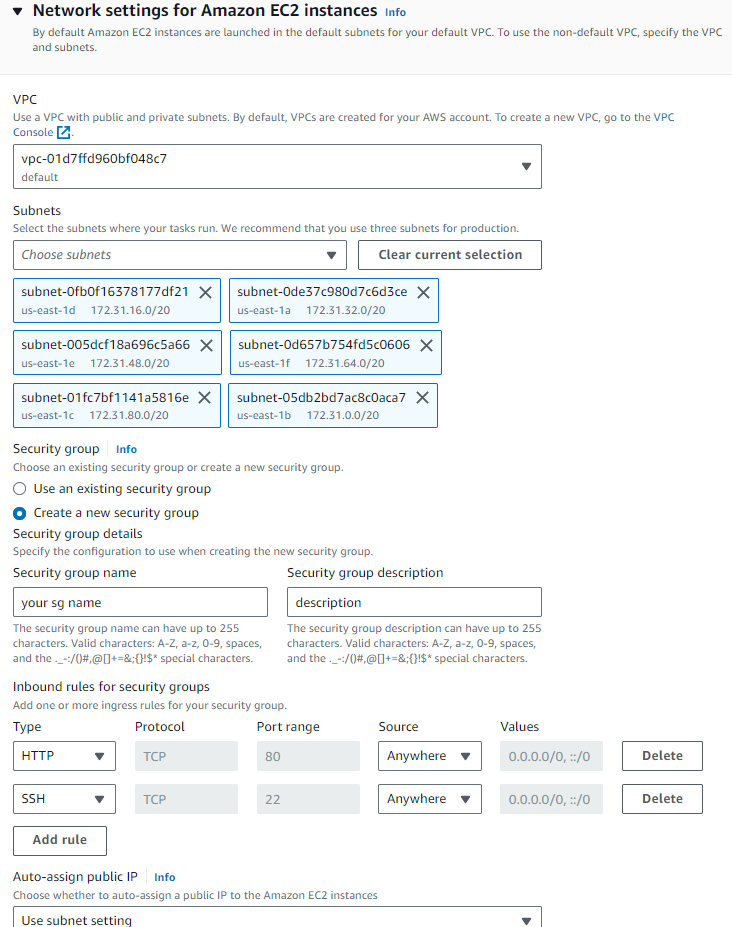
If you don’t have a default VPC and/or subnets, you have to create one manually. If you have no idea what they are, or how to create them, please refer to this video
https://www.youtube.com/watch?v=2doSoMN2xvI&list=PL0yqfPf4QbKGmyi-8DG1GVoESHs9tiY3z&index=73&t=1365s
You also have to create your security group. My security group allows
- http request into port 80 from anywhere around the world
- SSH into port 22 from anywhere
- This is not recommended
- I set it as anywhere sepcifically for this post
- You can configure the setting so that only your IP address can access your containers.
I am not going to configure the “monitoring” and the “tags” tab, so go ahead and click that “create” button to create your cluster.
Create Task Definition
Now let’s create our task definition
Infrastructure requirements
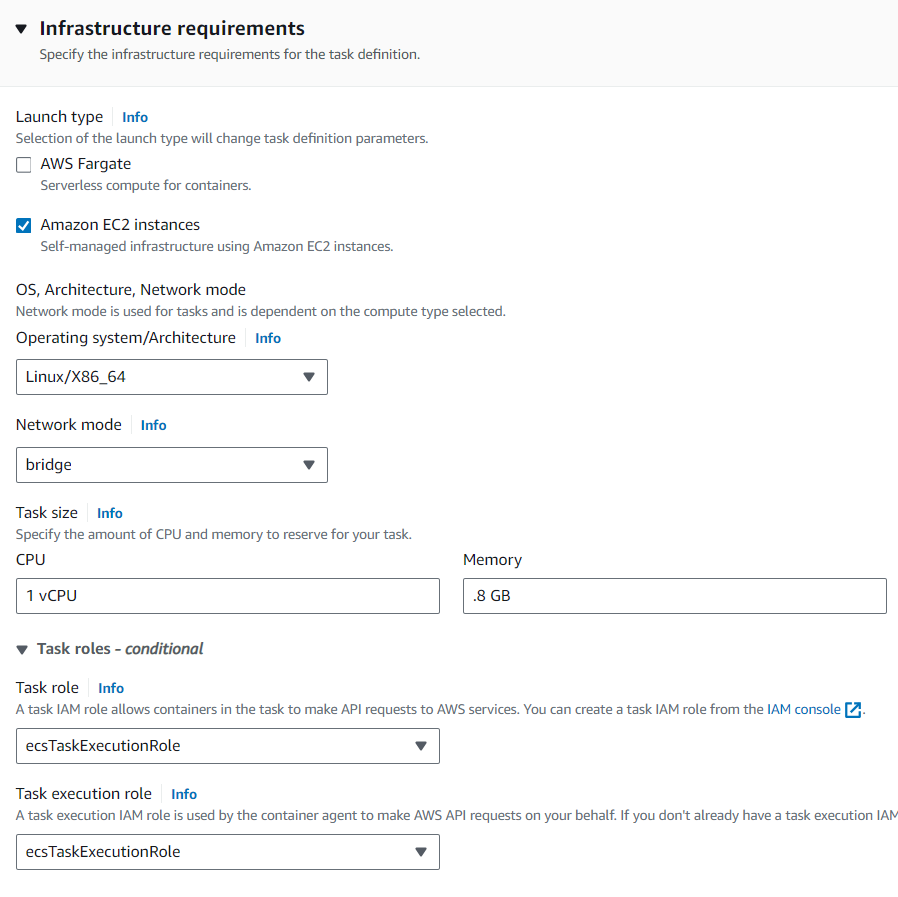
- set the launch type as EC2, and EC2 only (if you are going to launch it with EC2)
- set the os accordingly
- set the network mode to bridge!! This will enable the containers to refer to eachother by names, when we link them together.
- originally, if you launch with fargate, “awsvpc” network mode will automatically allow you to refer the containers by names.
- but if you use EC2 launch type, you have to use the “bridge” mode and manually link the containers together
- set the CPU and memory accordingly
- since we are using t2 micro, which provides 1 vCPU and 1GB of memory, we are going to set the CPU and Memory as 0.8 vCPU and 0.8 GB. Don’t mind the photo!
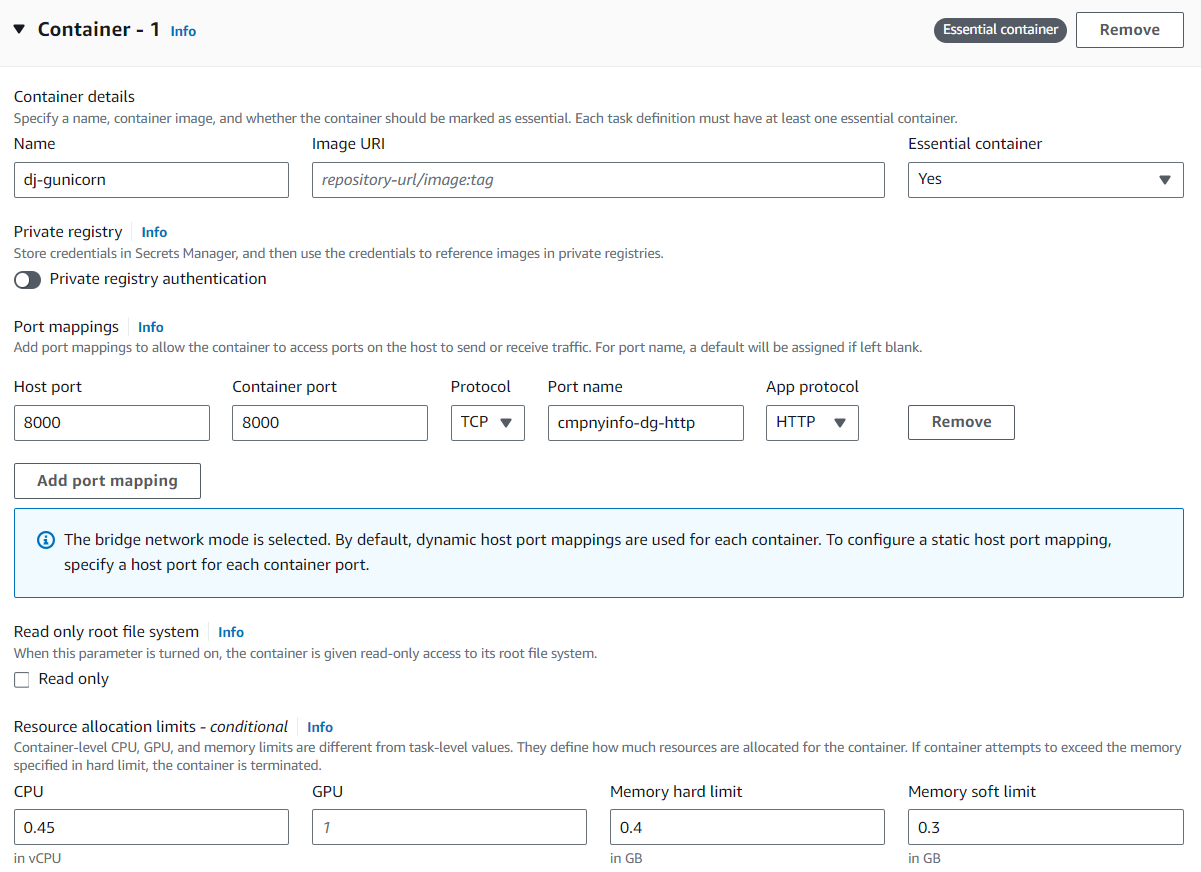
- set the name and the URI to the image in your ECR accordingly
- this container is the django container, so it will listen on port 8000
- set the CPU and Memory accordingly
- CPU should be 0.35 vCPU! NOT 0.45!
- you should also set your environmental variables. Variables such as
SECRET_KEYorDEBUGshould be set as environmental variable
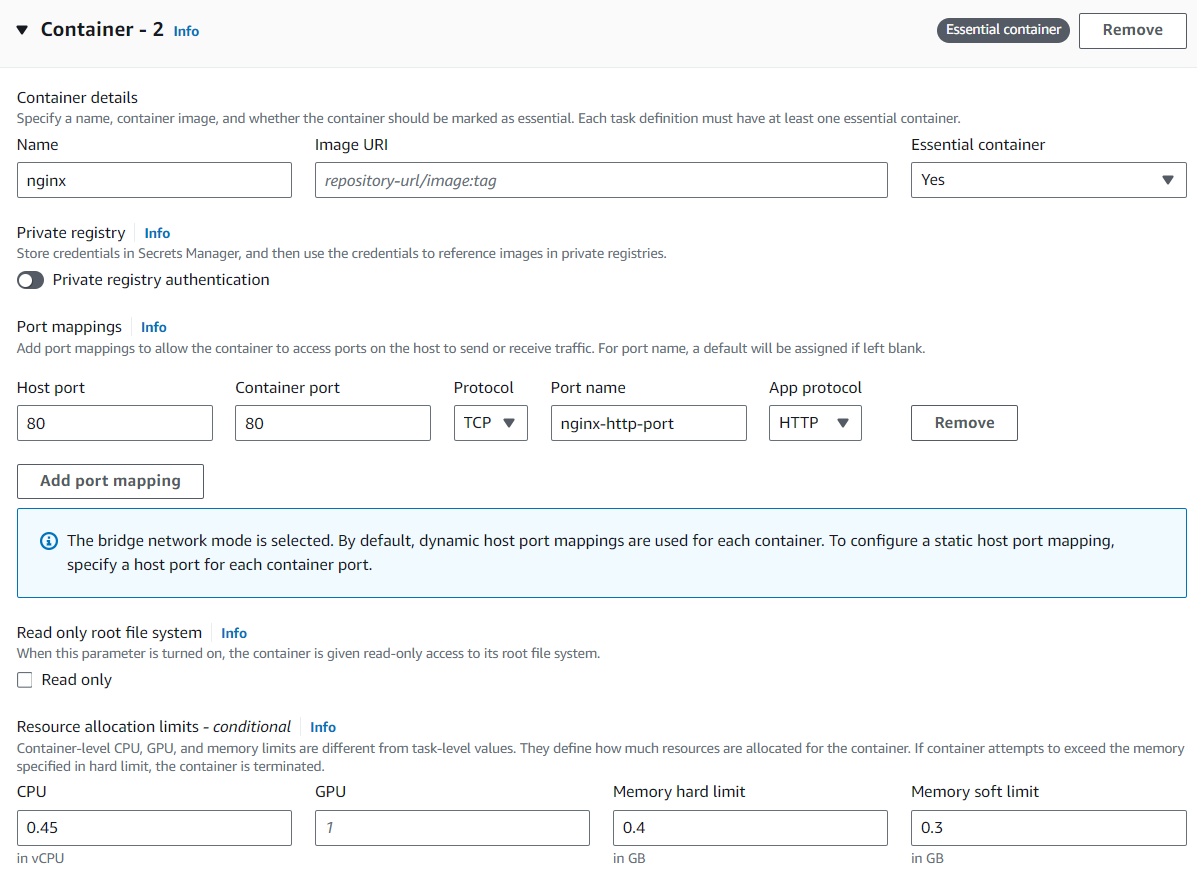
- Now let’s define the nginx container
- This container is listening on port 80
- set the CPU and Memory accordingly
- CPU should be 0.35 vCPU! NOT 0.45!
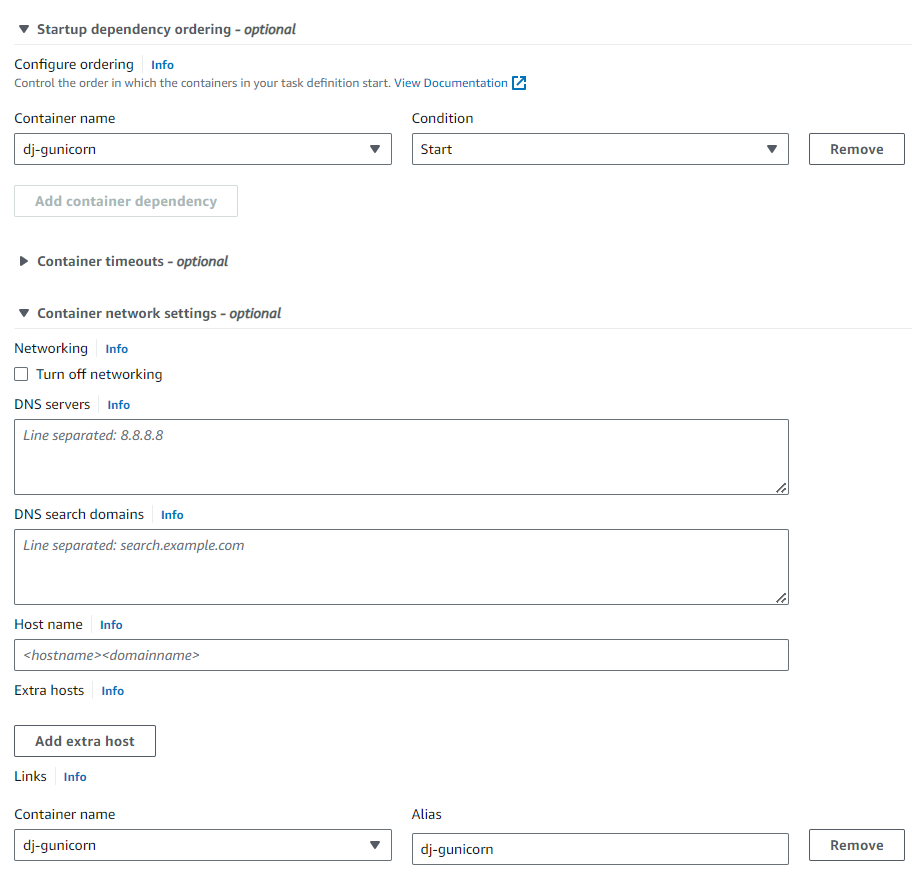
- startup dependency
- just like we did in the docker-compose file, we are going to set the nginx container dependent to the dj-gunicorn container
- Container network
- since we are using the “bridge” network mode, we have to link the containers.
Create service
Since we have created our task definition, now we have to deploy it to the cluster through ECS!
- Go to the “Cluster” tab and select the cluster you’ve created, then go to the “Service” and click “Create”
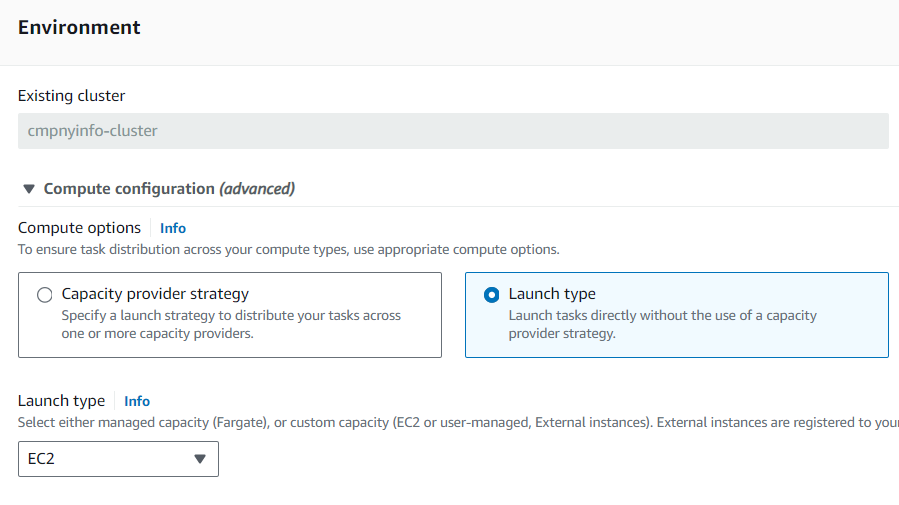
- select Launch type and EC2
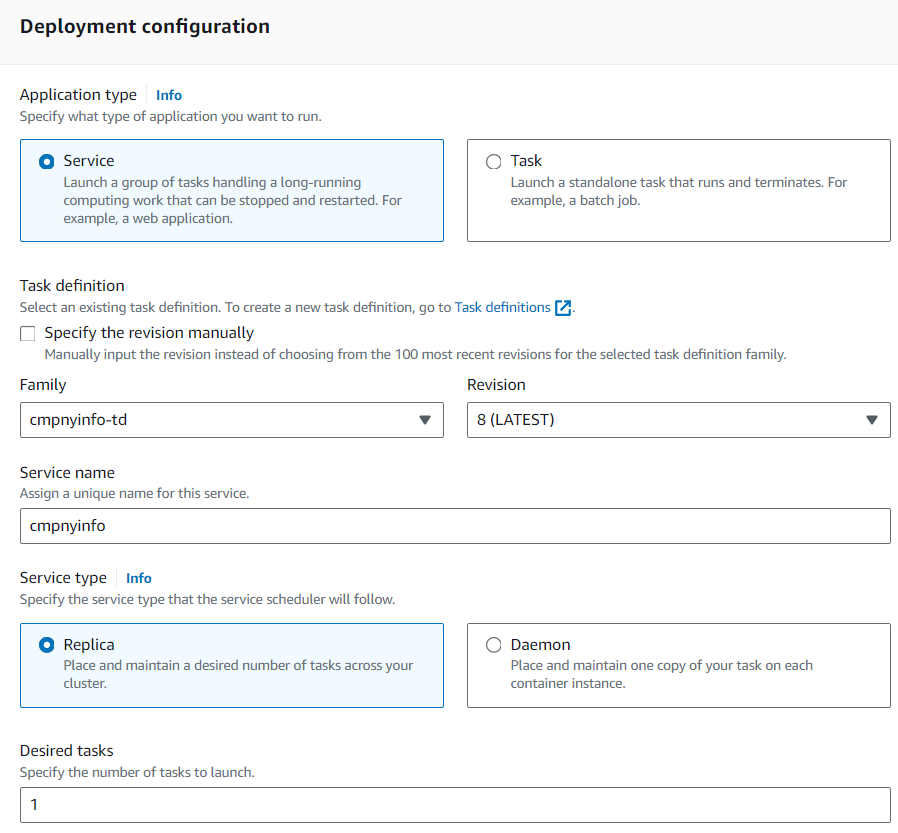
- set the family as the task definition you’ve created (for me is cmpnyinfo-td )
- set the desired tasks to 1
Finishing
Now that’s basically it! Now click “create” and pray that your service deploys just fine; which, barely happens. Here are some recommendations for you when you face error
When you’re stuck in provisioning state
- make sure that in the “infrastructure” tab in the cluster, there’s one or more EC2 instances running
- If you don’t see any instances, make sure that you set the minimum capacity as 1 when you created the cluster
- If you still couldn’t get out of the provisioning state, GOOD LUCK. Don’t give up. If you think you’ve got enough of it, just use fargate to launch
When the containers fail, or is in “stopped” state
- enable log checking when you create your task definition
- chekc the log and, GOOD LUCK!
Other problems
- Insufficient CPU/Memory: reduce the CPU and Memory in the task definition
- Other: GOOD LUCK. Try your best not to question your entire career!! We all go through this phase!
Written by
Roger Kim

